
How to photograph food for delivery apps, with just a phone
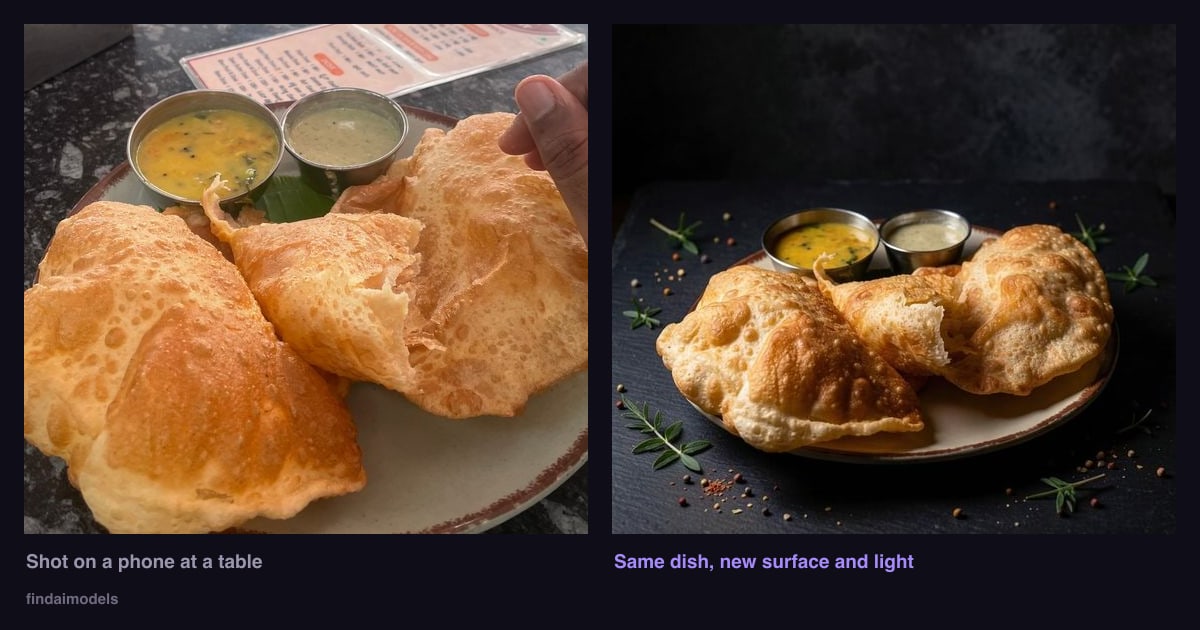
You do not need a camera, a stylist, or a day of shooting. You need daylight, a plain surface, and about a minute per dish. Here is what actually moves orders on a delivery listing — and what to skip.
The photo is the menu
On a delivery app nobody reads your description. They scroll a grid of squares and tap the one that looks like food they want right now. A dish with a good photo beside an identical dish with a bad one is not a slightly better listing — it is the one that gets ordered.
That makes menu photography one of the highest-leverage hours a small kitchen can spend, and one of the most commonly skipped.
Five rules that do most of the work
1. Shoot in daylight, never under kitchen lights
Kitchen fluorescents and warm bulbs push food green or orange, and no amount of editing fully recovers it. Move the dish to a window, or just outside the door. Overcast daylight is the single best light available to you and it is free.
2. Turn the flash off
A phone flash flattens the dish, blows out sauces into white patches, and throws a hard shadow behind the plate. If it is too dark for a no-flash photo, it is too dark — move, do not compensate.
3. Pick the angle from the food, not the habit
- 45° — the default. Works for burgers, sandwiches, anything with height.
- Straight down — flat food: pizza, thali, a spread, anything in a wide shallow bowl.
- Eye level — layers you want to show: a stacked burger, a drink with separation, a parfait.
The wrong angle is what makes a good dish look like nothing. A biryani shot from the side is a pile of rice; shot from above it is a biryani.
4. Fill the frame
The most common mistake is standing too far back. The dish should own the photo. Delivery apps crop to a square thumbnail, and anything at the edges is cropped away — including, often, half your plate.
5. Kill the clutter
A steel table with three other dishes, a napkin dispenser and someone’s hand in the corner reads as chaos at thumbnail size. One dish, one surface. If the surface is busy — a patterned cloth, a printed laminate — put a plain board or a sheet of paper under it.
Worth knowing: a busy background is also the single thing that breaks automated photo tools. Anything that separates your dish from what is behind it — plain surface, good contrast, no clutter — helps a human eye and a piece of software in exactly the same way.
What not to bother with
Props, garnish that is not on the actual dish, and steam effects. Two reasons. The first is that they take time you do not have when you are shooting twenty items. The second is more serious: a photo that promises something the plate does not deliver produces refund requests and bad reviews. On a delivery platform the customer compares your photo with the box in front of them within thirty minutes.
Shoot the dish you actually serve. Make it look like the best version of itself, not like a different dish.
Doing a whole menu
Batch it. Set up once beside a window, then bring dishes out one at a time. A twenty-item menu is about an hour of shooting if you are not re-setting between every plate. Shoot each dish two or three times at slightly different angles — it costs seconds and gives you something to choose from later.
Then stop. The temptation is to keep fiddling; the return drops off fast after the basics are right. Daylight, plain surface, filled frame, right angle. That is 90% of the outcome.
Or let the background do the work
FoodShots takes one phone photo of a dish and returns three finished 1080×1080 photos on studio-quality surfaces — the dish and the plate come from your photo, only the surface and the light change. $0.99 per dish, about a minute, no subscription.
Try FoodShots →